
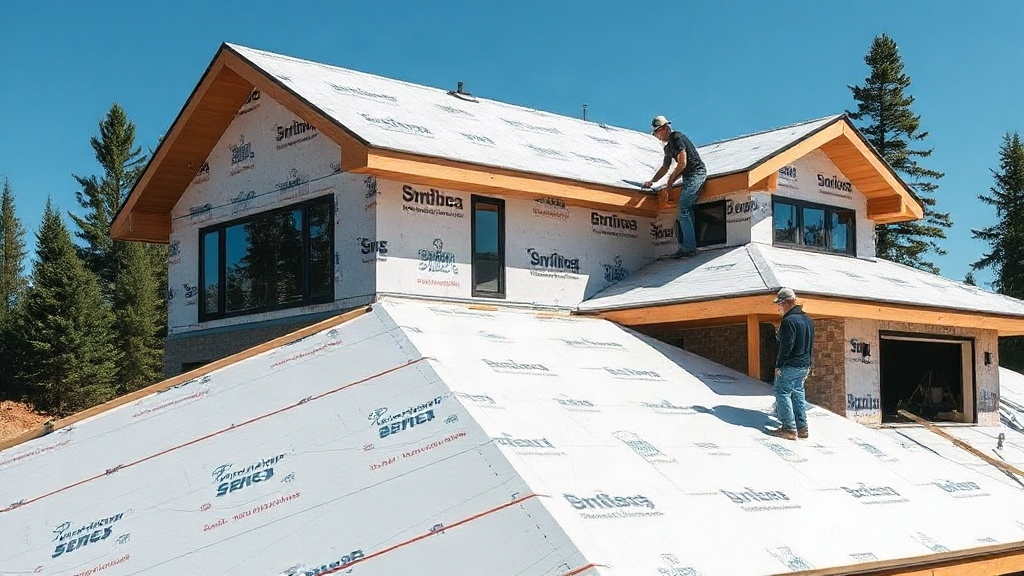
When I first started using insulated roof panels on a chilly Alberta job site, I was skeptical. Would these lightweight panels really stand up to -30°C winters and heavy snow loads? After a decade of installing them on everything from barns to custom homes, I can tell you: they do, and they have fundamentally changed how I approach roofing. If you are planning a build or retrofit in Canada, understanding EPS insulation in roof panels is one of the smartest moves you can make. This guide shares what I have learned on the job, from choosing the right panel to avoiding costly mistakes.
Why Insulated Roof Panels Are a Game-Changer
Traditional roofing meant layering rafters, sheathing, underlayment, and insulation on site. It was slow, weather-dependent, and often left thermal bridges that bled heat. Insulated roof panels flip that script. Each panel is a factory-made sandwich: a rigid foam core bonded between two structural skins, usually steel or oriented strand board (OSB). The result is a single component that insulates, spans, and protects in one go.
For Canadian climates, the advantage is massive. The continuous insulation layer eliminates the gaps and compressions that plague batt insulation. No more ice damming from warm air leaking through rafter bays. No more calling back the crew to fix a cold spot. I have measured surface temperature differences of up to 8°C between a code-minimum vented attic and an EPS-panel roof on the same street. That translates directly to comfort and energy bills.
Understanding EPS Insulation in Roof Panels
EPS insulation (expanded polystyrene) is the foam core in many of the panels I install. It is made from tiny beads expanded with steam and molded into large blocks, then cut to shape. Unlike polyurethane or polyisocyanurate, EPS does not use ozone-depleting blowing agents, and it maintains its R-value over time. For roof panels, EPS typically comes in densities from 1 to 2 pounds per cubic foot, with R-values around R-4 per inch.
What sets EPS apart for roofing is its moisture tolerance. Closed-cell foams like polyiso can trap water if the roof skin is compromised, leading to hidden rot. EPS has an open-cell structure that allows incidental moisture to drain and dry. In my experience, that breathability is a quiet lifesaver during freeze-thaw cycles. And because EPS is cost-effective, you can afford thicker panels for higher R-values without blowing the budget.
How EPS Compares to Other Cores
- EPS: R-4 per inch, moisture-tolerant, lowest cost, good for most roof applications.
- XPS (extruded polystyrene): R-5 per inch, higher moisture resistance, but more expensive and uses blowing agents with higher global warming potential.
- Polyiso: R-6 per inch initially, but loses R-value in cold weather; best for walls in milder climates.
- PUR/PIR: R-6 to R-7 per inch, excellent for thin profiles, but sensitive to moisture and costly.
For Canadian roofs, I almost always spec EPS unless there is a tight thickness constraint. The slight R-value advantage of polyiso disappears when temperatures drop below freezing, and EPS gives you predictable performance year-round.
Types of Insulated Roof Panels for Canadian Builds
Not all panels are created equal. The right choice depends on your building type, span, and budget. Here are the main categories I work with.
Sandwich Panels Canada: What to Look For
Sandwich panels Canada manufacturers produce come in two main flavors: metal-skinned and OSB-skinned. Metal-skinned panels, often called insulated metal panels (IMPs), are the go-to for commercial and agricultural buildings. They offer a factory-applied finish, excellent fire performance, and can span long distances. OSB-skinned panels, on the other hand, are popular for residential roofs because they accept shingles, metal roofing, or membrane. They are also easier to cut and fasten on site.
When sourcing sandwich panels Canada wide, check for Canadian Construction Materials Centre (CCMC) evaluation reports. That tells you the panel has been tested for structural, thermal, and fire performance in our climate. Also confirm the panel thickness and skin gauge meet your local building code. I have seen too many builders order cheap panels from overseas only to find they lack the required certifications, leading to failed inspections.
Insulated Roof Panels: Metal vs. OSB Skins
Metal-skinned insulated roof panels are ideal for shops, barns, and commercial buildings where durability and low maintenance matter. They come with standing seam or exposed fastener profiles. Standing seam is my preference for roofs because it hides fasteners and allows for thermal movement. OSB-skinned panels are better for houses where you want a traditional roof covering. They are heavier and require more careful handling, but they integrate seamlessly with conventional framing.
One more option is a hybrid panel with a metal exterior and OSB interior. These are gaining traction for their combination of weather resistance and interior finish flexibility. However, they cost more and may have longer lead times.
Installation Best Practices for EPS-Cored Panels
Even the best panel fails if installed poorly. Over the years, I have developed a checklist that keeps my crews efficient and my roofs leak-free.
- Plan the layout. Start panels from the eave and work upward, ensuring the tongue-and-groove joints are fully engaged. Measure twice, cut once.
- Handle with care. EPS cores can be damaged by rough handling. Use vacuum lifts or multiple people to avoid cracking the foam.
- Seal joints. Apply a bead of high-quality sealant in the joint before engaging panels. This is your primary defense against water infiltration.
- Fasten correctly. Use the manufacturer's recommended screws and washers. Overdriving can crush the foam and create a thermal bridge.
- Flash penetrations. Chimneys, vents, and skylights need proper flashing. I use prefabricated boots with butyl tape and metal counterflashing.
For metal roofs, always allow for thermal expansion by using slotted clips or standing seam profiles. For OSB panels, ensure the roof deck is dry before installing shingles. A little patience here prevents big headaches later.
Energy Efficiency and Cost Savings
The primary reason clients choose insulated roof panels is energy savings. A typical 2-inch EPS panel provides around R-8, while a 6-inch panel hits R-24. That is continuous insulation, meaning no thermal bridging through rafters. In a 1,500 square foot bungalow, upgrading from a vented attic with R-40 blown-in to a 6-inch EPS panel roof can reduce heating costs by 15 to 20 percent, based on my own energy audits. Cooling loads drop too, because the reflective metal skin bounces solar heat.
Beyond energy, you save on labor. A two-person crew can install 1,000 square feet of panel roof in a day, compared to several days for stick-framed and insulated. That speed reduces scaffolding rental and weather delays. For DIYers, the panels are manageable with a helper and a good set of tools, though I always recommend a professional for the first install.
Common Mistakes to Avoid
I have been called to fix other people's panel roofs more times than I can count. Here are the pitfalls I see repeatedly.
- Inadequate ventilation: Even though EPS panels are less prone to moisture issues, they still need a vented cavity if you are installing over an existing roof. Trapped moisture can rot the deck below.
- Wrong fasteners: Using standard screws without washers leads to leaks. Always use the manufacturer's specified fasteners.
- Ignoring thermal movement: Metal panels expand and contract. If you fasten them rigidly, they will buckle. Use sliding clips or standing seams.
- Poor panel alignment: Crooked panels are not just ugly; they compromise the seal. Take the time to snap chalk lines and check squareness.
Frequently Asked Questions
What is the R-value of a 4-inch EPS insulated roof panel?
A 4-inch EPS core typically provides around R-16, assuming an R-value of 4 per inch. However, the overall panel R-value can be slightly higher due to the skins, but it is best to use the core value for code compliance.
Can I install insulated roof panels over an existing shingle roof?
Yes, you can, but you need to ensure the existing roof is structurally sound and flat. Often, you can install panels over a layer of rigid foam or purlins to create a ventilation gap. Check with your local building department for code requirements.
How do EPS panels hold up in extreme cold?
EPS maintains its R-value in cold temperatures better than polyiso, which loses performance below freezing. EPS also remains flexible, so it resists cracking from thermal shock. Many Canadian builders use EPS panels in temperatures down to -40°C without issues.
Are insulated roof panels suitable for DIY installation?
They can be, but it depends on the panel type. Metal-skinned panels are heavy and require careful handling. OSB panels are more DIY-friendly but still need two people. I recommend hiring a professional for the first installation to learn the techniques.
How do I calculate the payback period for insulated roof panels?
Payback depends on your energy costs and climate. As a rough estimate, divide the extra cost of the panels over traditional insulation by your annual energy savings. In Canada, many homeowners see payback in 5 to 10 years, plus the added comfort and durability.
Final Thoughts
Insulated roof panels with EPS cores are not a fad. They are a proven solution for Canadian buildings that need to stand up to harsh weather while keeping energy bills in check. Whether you choose metal-skinned sandwich panels Canada suppliers offer or OSB panels for a residential retrofit, the key is proper installation and attention to detail. Take the time to plan, use quality materials, and follow best practices. Your roof will reward you with decades of reliable performance.